CUSTOM HEADWEAR / BUYER GUIDE
Custom Hat Tech Pack for a First Sample: A Handoff Checklist
Prepare a first-sample hat tech pack or update an earlier brief. Record artwork versions, packing checks and reorder changes before requesting a current offer.
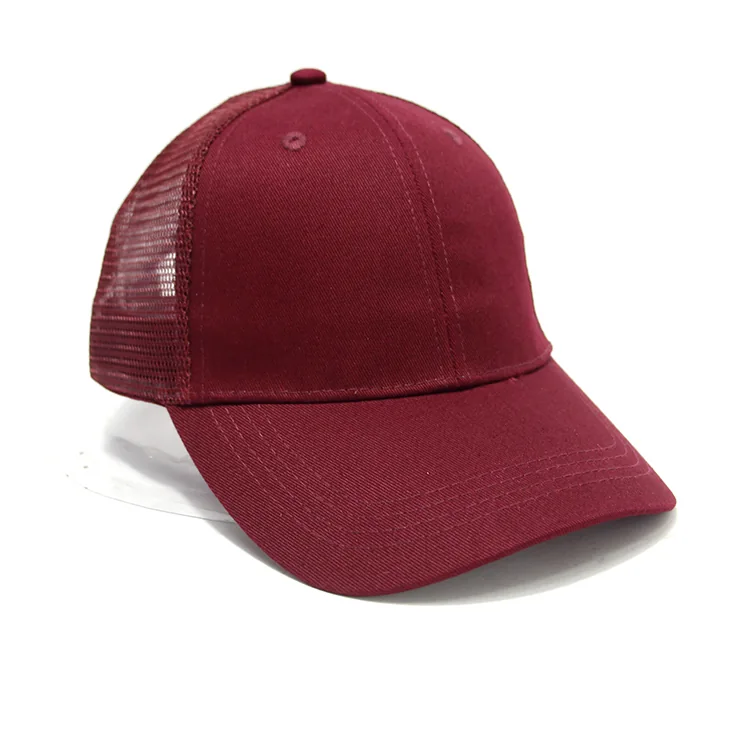
A first-sample tech pack is a handoff record, not a promise that every hat detail has already been settled. It tells a supplier what the buyer has decided, what is only proposed and what still needs an answer. That distinction is useful even when the starting point is just a cap reference, a logo file and an estimated quantity. The same handoff structure can carry forward named earlier references when you prepare a reorder brief.
The burgundy cap above has a plain front, a mesh-looking side panel and a curved brim. Those visible areas can help name fields in a brief, but the photograph cannot supply missing measurements, fiber composition, decoration feasibility or approval for a future order. Use one document version for the discussion, with artwork and reference images as separate, named attachments.
Start with a brief that has an owner and a version
Put the project ID, brief version and date at the top of the handoff. Name the buyer contact and the person who will answer supplier questions. When you change a decision, issue a new version instead of silently replacing an attachment. The goal is to make it clear which notes belong to the first sample request.
You can begin with the four project brief essentials: hat direction, design reference, estimated quantity and destination or target date if known. Mark a missing answer as open. An estimated quantity helps frame a discussion, but no minimum order, price or lead time follows from this checklist.
When written quotations arrive, use the custom hat quote comparison checklist to check whether each supplier included the same design, quantity split and delivery scope. This tech pack records the design handoff; the comparison guide addresses the commercial scope of the replies.
The headwear range helps name your starting shape. If your reference is a baseball or dad cap, the cap options give you a category name; the precise crown, brim and closure still belong in the project brief. Do not write “same as photo” when only one feature in the photo matters.
Give each line a decision status
Use decided, proposed and open as working labels for every field. A decided field has a named reference and owner. A proposed field asks the supplier to confirm feasibility. An open field records the question that must be answered before a sample decision. “Decided” describes the buyer’s current instruction; it does not mean the supplier has accepted feasibility or that a physical sample has passed.
| Handoff field | What to attach or specify | Status and next evidence |
|---|---|---|
| Hat shape | Category, front/side reference and the features you mean | Decided, proposed or open; request a matching sample view |
| Structure and size | Crown, brim, closure and named measurement points | List any buyer target with units and source; confirm the measuring method and feasibility |
| Material and color | Proposed material specification, color zones and physical reference if available | Ask what can be sourced; approve shade on the agreed material and finished hat sample as applicable |
| Artwork and decoration | Source file, version, intended position and proposed method | Ask for a placement proof and feasibility response |
| Inside finish, labels and packing | Band and seam-finish requirements, label location and copy, packing presentation, if applicable | Separate physical-finish questions from missing label copy or layout; mark unresolved fields as open |
| Order context | Quantity estimate, destination and target date if known | Confirm commercial terms for the actual design and order |
For a cuffed beanie, name the fold arrangement and measuring state before filling in dimensions. The beanie cuff depth and fold guide separates visible cuff depth, fold position and folded or unfolded height, so each target has identified edges and a sample check. Once the fold arrangement is identified, the cuff-or-body decoration layout check helps mark the visible artwork area and the questions to recheck after a change.
If you already have target dimensions or color codes, list them as proposed with their source, units and named measuring points; ask the supplier to confirm feasibility and check them on the physical sample. Leave unknown fields open. Do not copy a dimension, tolerance or performance claim from a photograph or generic template. The customization overview outlines available discussion areas, but the exact materials and decoration method are project decisions.
For the inside, specify which band, seam-covering, decoration reverse and label details need review. The inside-finish checklist helps turn those fields into named physical-sample checks. Label wording and its attachment are separate decisions; leave required text open until the responsible reviewer supplies it.
If a label will be folded or inserted into a seam, include its complete drawing and the proposed attached layout in the brief. Use the label fold and reading direction checklist to mark the visible face, hidden or attachment areas, reading view and whether each dimension refers to the complete label or its visible part. Keep undecided arrangements open for a supplier response.
For a requested size label, link the intended cap variant to its designation and current artwork/copy revision. The size-label identity and reading check helps plan location and attached-state evidence; keep measured cap fit separate from the printed designation.
For illustration only, two lines in that handoff might read:
- Hat shape — attachments
reference-A-front.jpgandreference-A-side.jpg; buyer owner: decided on the visible shape direction; next evidence: supplier’s matching front and side sample views. - Artwork — attachments
logo-source-v2andmarked-front-v1; buyer owner: proposed placement; next evidence: supplier feasibility reply and a finished sample check.
These names are example file IDs, not files from a real order. Each line gives the reviewer an owner, a current status and a way to close the question.
Keep source files separate from annotated views
An annotated image is a map of questions, not the production artwork. Give each original artwork file its own name and version. Put arrows or labels on a copy of the cap reference to identify the front, side, rear or underside locations that matter. Include a simple file list in the brief so a supplier can tell which attachment is current and which is only a visual reference.
If the project also needs images for a catalogue or listing, keep a separate product photo handoff brief for the requested views, files, edits and permitted uses. Confirm who will supply those assets and which scope is agreed.
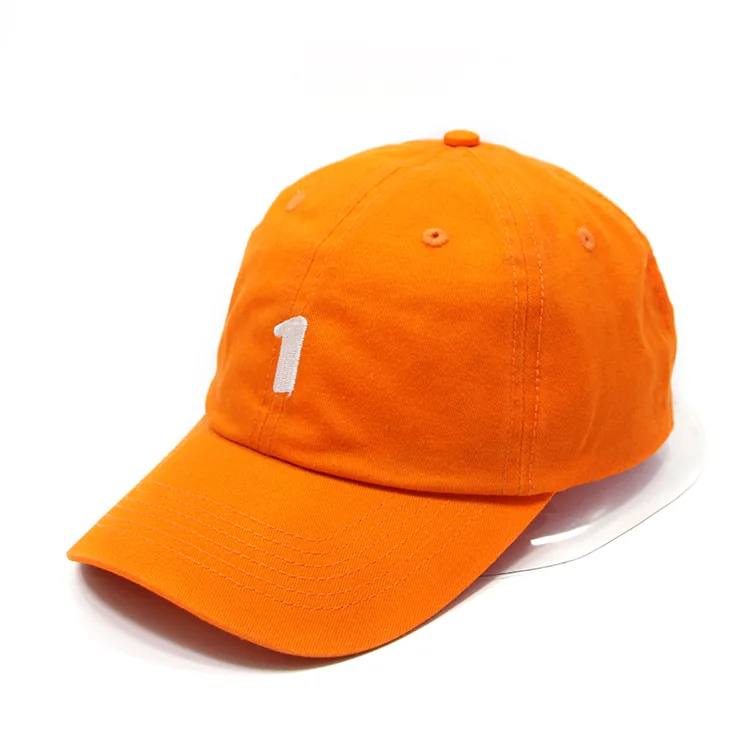
For example, a note can say “front logo position: proposed; see marked front view; use artwork file [name/version]; finished size and method: supplier to confirm.” For a measured request, include the cap-front placement record with its artwork point, hat reference, units and measuring path; identify an absolute target or a relative correction from a named sample. This is a useful handoff without pretending that a screen preview has settled stitch detail or final dimensions. The 3D Studio can help communicate an early hat-shape or logo concept; it does not replace a marked specification and physical sample.
If a reference photo carries a motif or logo you do not own, do not treat it as artwork to copy. Use owned or licensed artwork, or confirm the rights and available supplier pattern before requesting reproduction. The pattern-placement guide explains how to mark named seams and brim areas when a pattern crosses them.
Separate packing artwork from a packed-sample check
Name exactly what each packing approval covers. A layout proof, approved wording and a photograph of a packed hat answer different questions. Give packing its own brief field and revision, even when the hat design is unchanged. If packing is not yet part of the request, leave the format open. The cap photographs in this guide identify product references; neither shows proposed packaging.
| Record | What the buyer should identify | What it does not settle |
|---|---|---|
| Artwork proof | File/version, intended printed faces, orientation and marked dimensions with units | Physical material, final print appearance or the packed result |
| Label or insert copy | Current text file/version and the person responsible for approving that wording | Attachment, position or readability on the finished item |
| Packing presentation | Proposed components, order of assembly and where the hat, tag or insert sits | Whether the requested arrangement works on the actual hat |
| Packed-sample check | Named physical hat revision, packing revision and agreed views or handling checks | Performance in transport or approval of an unseen bulk shipment |
Start with a plain written description of the requested presentation. Mark which requirements are buyer decisions and ask the supplier to confirm the proposed arrangement and available sample evidence. Identify any dimensions or counts as buyer targets with their source; do not extract them from a reference photograph. Keep an undecided material, size or assembly detail open for a response.
Review the current artwork proof for spelling, reading direction and placement on its named faces. Keep required wording with the responsible buyer reviewer; a layout cannot verify a composition, care, origin or other product claim. Record approval of the file and the listed details separately from any physical packing decision.
For the packed-sample review, request views that show the complete presentation and relevant hidden faces or inserts. Confirm that the evidence refers to the same hat and packing revisions. If the arrangement conceals a detail, request the agreed unpacked view or physical check. Examine the hat after unpacking under consistent support and review conditions. A single photograph cannot establish protection during shipping; leave that question open unless the project has the appropriate agreed evidence.
Keep a compact record with these fields:
Packing revision [ID] · Linked hat sample [ID/revision] · Artwork and copy files [versions] · Decision owner [name] · Evidence received [references] · Approved details [list] · Open items [list] · Next evidence [request].
These are empty fields for your project. After a change, state which earlier decisions remain valid and which need rechecking. Separately use the quote comparison packing line to confirm whether the requested packing is included in the current offer. A proof decision does not settle a price, packing service or delivery term.
Prepare a reorder brief with named prior references
Identify the earlier reference for each detail you want to retain. “Same as last time” leaves the supplier to work out which hat variant, artwork file and accepted sample you mean. Give the new request its own brief ID, version and date, then link the earlier project or order reference and the relevant specification, artwork and acceptance records.
Start with the actual variant you intend to reorder. If you have an accepted physical sample, identify that piece and the decisions recorded against it. An earlier order number alone does not identify every accepted detail. If the sample or a supporting file is unavailable, state what is missing and leave the affected requirement open; do not reconstruct an unseen specification from a photograph.
For each relevant field—hat construction, material specification, color reference, decoration, labels or packing—write one of these requests:
- Retain: cite the exact earlier specification or accepted detail.
- Change: name the earlier requirement and the replacement instruction or file.
- Open: state the unresolved question, its owner and the evidence needed.
These describe your intended treatment of the field. Keep them separate from whether the supplier has confirmed the current request and whether its physical result has been checked. Ask the supplier to identify proposed substitutions or effects on neighboring details before closing the response.
Copy this record once for each affected field:
New brief [ID/version] · Hat variant [ID] · Detail [field/location] · Earlier reference [specification, artwork and accepted sample/decision IDs] · Current request [retain/change/open, with exact instruction] · Supplier response [confirmation, proposed alternative or unanswered question] · Next agreed evidence [file, view, measurement or physical check] · Decision owner [name].
The brackets are empty fields for your own project. Use the sample revision log for any new correction and its returned evidence.
Finally, send the new quantity, destination and timing request with the brief. Reconfirm the current commercial scope. A request to retain a design detail does not establish current material availability, price, sampling requirements or delivery terms.
Convert open cells into specific questions
Send a short question list with the first-sample request. Separate a buyer decision from a supplier feasibility check and from something only the physical sample can prove:
- Buyer decision: Which crown shape, color zones and artwork version are current? Who will approve a change?
- Supplier response: Which proposed material, decoration and construction details can be made for this design? What alternative needs a new decision?
- Sample evidence: Which measurements, views and finished details must be checked on the first physical cap?
Here is a compact handoff example. The brackets are fields to fill, not real order specifications:
Project [ID] · Tech pack [version/date] · Hat direction [category/reference] · Artwork [filename/version] · Quantity [estimate or open] · Destination [country/region or open] · Buyer-decided details [list] · Supplier feasibility questions [list] · First-sample checks [list] · Contact for decisions [name].
When the sample arrives, compare it with the same brief version and record which fields are approved, need revision or remain open. The five-view cap sample guide covers the front, side, rear, inside and overall views to request at that stage. Its sample revision log gives each correction an issue ID, next evidence and recheck decision. A sample-review note is the next document, not a substitute for the initial handoff.
When several buyer reviewers comment on that sample, use the buyer team comment consolidation record to separate required changes, preferences and questions, resolve competing requests with the named decision owner, and issue one instruction before opening revision entries.
Ready to begin? Send Alex the current brief and named artwork files, plus the hat direction, estimated quantity and destination you know. An incomplete but clearly labeled brief is easier to discuss than a polished sheet that hides unanswered questions.